How to

Staining outdoor timber can be a rewarding project, giving new life to your garden furniture, decking, or sheds. However, even the most experienced DIY enthusiasts can sometimes encounter issues during the process. Mistakes such as uneven application, blotchy spots, or the wrong shade can be frustrating, but don’t worry—most staining mistakes can be corrected with the right approach. In this guide, we’ll walk you through how to fix common staining mistakes and how Timbashield’s range of wood care products can help you achieve a flawless finish.
1. Identifying the Mistake
Before you can fix a mistake, it's important to identify exactly what went wrong. Here are some common staining issues:
- Blotchy or Uneven Stain: This can occur due to inconsistent application or the wood absorbing the stain unevenly.
- Drips and Runs: These are usually the result of applying too much stain or not wiping off excess properly.
- Sticky or Tacky Surface: This can be caused by over-application or not allowing enough drying time between coats.
2. Avoiding Blotchy or Uneven Stain
One of the more frustrating things that can happen whilst staining. Unfortunately, there is no easy way to fix it – the best way is to avoid it outright.
- Prepare the Surface: if the surface has been treated previously, it’s usually beneficial to sand the surface so the new product can absorb easier- sanding in the direction of the grain until all cross-grain scratches are gone is a time-tested approach.
- Double-check before starting: make sure to prepare the wood the best you can and try to fix mistakes before applying any products.
- Clean the Surface: Wipe down the sanded areas with a damp cloth to remove dust and debris.
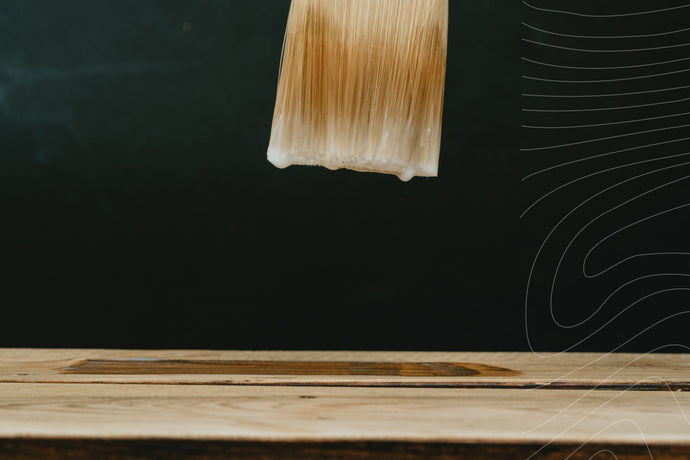
- Apply Stain: Use Timbashield's Wood Stains or Treatments, ensuring even application. Apply the stain in thin, consistent layers and allow each coat to dry completely before adding another.
3. Getting the right colour
After putting in the hard work to apply your wood stain, it can be disheartening when the colour doesn't turn out as expected. That is why it is so crucial to pick the right product beforehand. Taking into account the texture and the type of wood – choosing the most optimal choice will provide you with the desired coating.
Ultimately, keep in mind that the final look of wood is strongly influenced by its colour – as the products are stains and the final view works in combination with the original colour of the wood.
- Determine the wood type: Make sure to understand the type of wood you’re working with. Rough-sawn wood will absorb more stain and give a darker shade, while smooth-planed wood won’t absorb as much, resulting in a lighter shade. Additionally, older, grey wood can appear in different shades after coating.
- Choose accordingly: products designed for staining different types of wood may have different end results – including colour
- Don’t overdo it: be careful of coating the wood too many times as it can lead to undesired effects as well as wasting your money. Make sure to check the product instructions – whether it’s a one-coat product or a system that needs multiple coatings. Wait until the product dries completely to check the effectiveness and the colour.
4. Fixing Drips and Runs
- Fix it while fresh: do your best to wipe away any imperfections before the stain starts drying.
- Sand the Affected Area: If you notice problems after everything is dry - use fine-grit sandpaper to smooth out drips and runs.
- Blend the Area: Lightly re-stain the sanded area with a matching shade from Timbashield's products, blending it with the surrounding wood.
5. Tackling Sticky or Tacky Surfaces
- Wait Longer: Ensure the stain is completely dry before applying another coat. This might require more time in humid or cool conditions. Timbashield does not recommend applying treatments in these conditions as it can affect the drying times and the durability of the finish.
- Wipe Excess Stain: If the surface is still sticky, wipe off the excess stain with a clean, dry cloth.
Conclusion
Staining your outdoor timber doesn’t have to be a daunting task, and even if mistakes happen, they can often be fixed with a little patience and the right techniques. By following these steps, you can ensure your outdoor timber projects look their best.
Remember, for the best results, always use high-quality brands such as Timbashield. Our range of wood care solutions is designed to provide superior protection and a beautiful finish for all your outdoor timber needs. Visit our website to explore our full range of products and find the perfect solution for your next project.
Struggling to find the right product for your project? Use our product selector to find the best products for your unique projects.
Tackling Mould & Algae: Restoring & Preserving Outdoor Wood
Restore and protect outdoor wood this spring! Learn how to tackle mould & algae and preserve wood with Timbashield’s expert tips.
view this post
Seasonal Wood Care: Protecting Your Exterior Wood Throughout the Year
Discover year-round tips to protect and maintain your outdoor wood. From winter frost to summer sun, keep your wood durable, beautiful, and weather-ready!
view this post
How Do I Protect My Wooden Garden Furniture From the Weather?
With proper care, your furniture can become a lasting part of your garden - providing a cosy spot for afternoon tea or a comfortable place to enjoy those precious sunny days when they arrive.
view this post